The playground
The vehicle workbench
The Vehicle panel: pick a preset or build a stack, and watch the numbers judge it before anything burns.
The Vehicle panel is where the rocket is built. It reads from the top down in the order you make decisions: which vehicle to start from, what that vehicle adds up to, what is wrong with it, what it carries, and then each stage in turn. Every edit applies at once — the numbers, the blueprint, the checks, the rocket standing on the pad and the launch-readiness card all follow — and is saved in the browser as you make it.
This page is about the panel. What the numbers mean for the flight, and how the designer derives them, is in the vehicle.
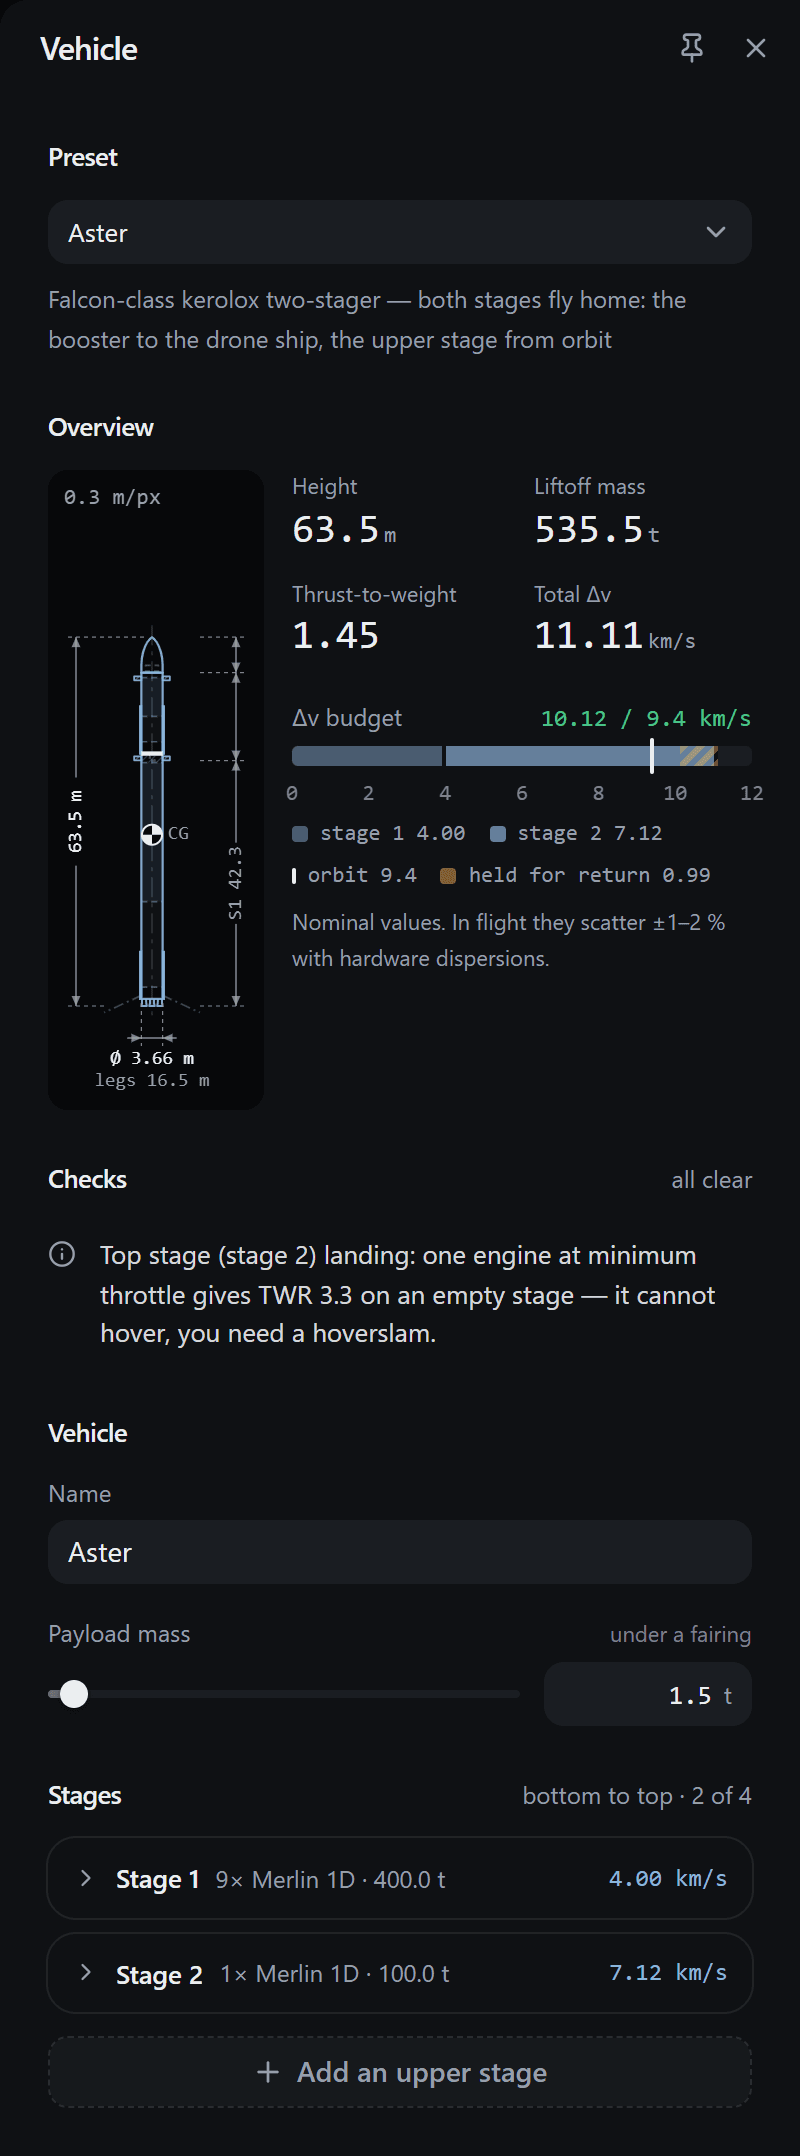
- 1Preset, with a line about the vehicle under it.
- 2The blueprint: a side view to scale.
- 3Height, liftoff mass, thrust-to-weight and total Δv.
- 4The Δv budget, against the cost of reaching orbit.
- 5Checks: errors, warnings and notes on the design.
- 6The vehicle's name and its payload.
- 7The stages, bottom to top. Each card opens.
- 8Add an upper stage — up to four.
Presets
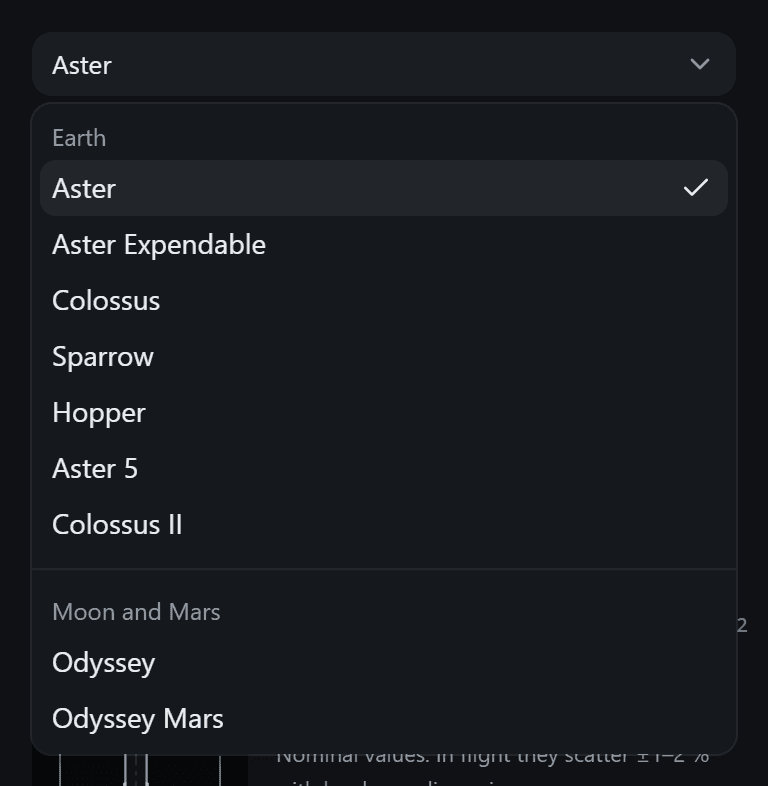
The Preset picker at the top loads a complete vehicle. Under Earth are Aster, Aster Expendable, Colossus, Sparrow, Hopper, Aster 5 and Colossus II; under Moon and Mars, the two four-stage stacks built to leave Earth, Odyssey and Odyssey Mars. The line under the picker describes the one loaded. The vehicle lists the Earth vehicles' numbers side by side, and missions and destinations the other two.
As soon as you change anything, the picker reads Custom configuration and the line under it Edited configuration — pick a preset to start over. An edit that lands exactly on a preset's numbers is recognised as that preset again. Picking a preset over an edited vehicle asks first — Load the Hopper preset? It replaces your edited vehicle — because there is no undo; export a flight file from the share menu if you want to keep it.
Two presets change more than the vehicle. The Hopper switches the mission to the Hop profile, and choosing an orbital vehicle after it switches the profile back to Orbital; either way a toast says so, with a button to open the Mission panel.
The demo missions for the Moon and Mars load Odyssey or Odyssey Mars for you, and the picker then names it.
The overview
The overview is the vehicle as a whole: a drawing, four numbers, and the budget that decides whether it can do the mission.
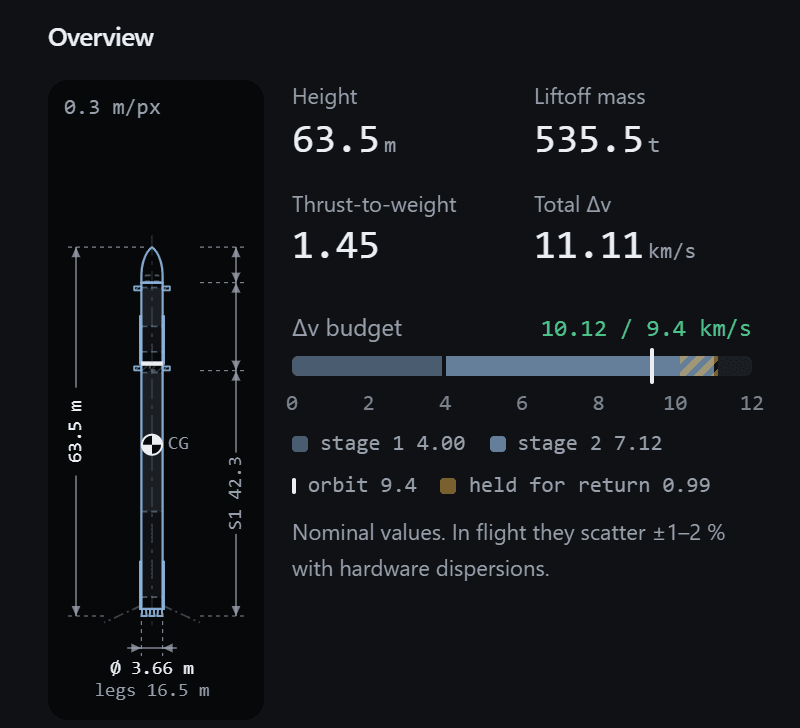
- 1The blueprint, to scale: the caption is its metres per pixel.
- 2Height, liftoff mass, thrust-to-weight at liftoff and total Δv.
- 3The headline: Δv for the climb against 9.4 km/s.
- 4Each stage's share of the Δv, darker for the lower stages.
- 5The white line: 9.4 km/s, low Earth orbit with its losses.
- 6Hatched: Δv held back for the return.
The blueprint is a side view of the stack at true scale: stage lengths, the diameter, the span of the legs, and the centre of gravity marked CG. On a real launch site it draws the tanks in the order they fly. Pointing at a stage highlights it and its card below; clicking it opens that card.
The four numbers are the stack's height, its mass on the pad, its thrust-to-weight at liftoff at sea level, and the sum of its stages' Δv. Thrust-to-weight turns amber below 1.15, where gravity eats most of the thrust, and red below 1, where the vehicle cannot leave the pad; hover it for the reason.
The Δv budget is the number to watch. The bar is built from each stage's contribution — the first stage counted halfway between its sea-level and vacuum figures, the upper stages in vacuum — and the white line at 9.4 km/s is what reaching low Earth orbit costs once gravity and drag have taken their share. Stages with legs have to keep propellant for their own way home: a booster about 1.8 km/s worth for its boostback, entry and landing burns, an upper stage 650 m/s for its de-orbit and landing. That propellant is dead weight on the way up, and the bar shows the Δv it costs as the hatched section, held for return. The headline compares what is left for the climb with the 9.4 km/s, and its colour is the verdict:
- green — enough for orbit with the return propellant held back;
- amber — enough for orbit only by spending the return propellant, so the stages cannot come home. The readiness card says orbit, but no landing;
- red — not enough for orbit at all.
For a hop the orbit line is not drawn and the headline is just the total. The note under the bar is a reminder that these are nominal figures: in flight each engine and tank scatters by 1–2 %.
The launch-readiness card on the pad carries the same verdict in words, such as Δv to orbit 10.12 of 9.40 km/s with return reserves. For a Moon or Mars mission it adds a second line if what is left after orbit is short of the launch window's cost. Coming back down explains why the reserve is as large as it is.
Checks
The designer checks the vehicle every time it changes. The Checks heading counts what it found — all clear, or so many errors and warnings — and each line says what is wrong in words, most serious first.
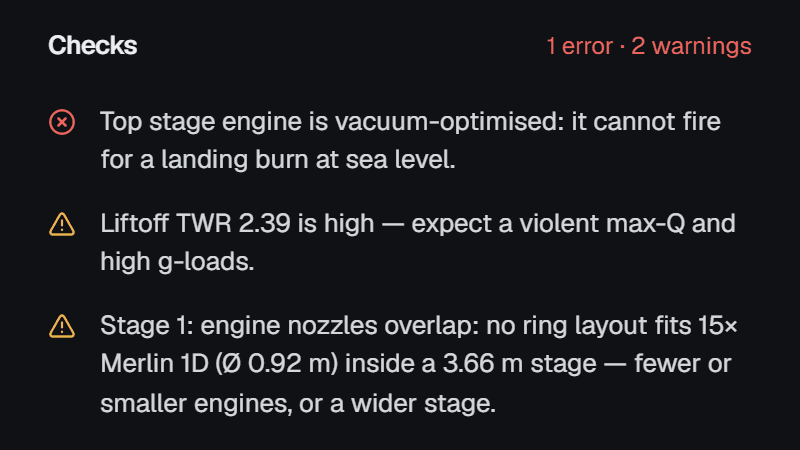
- An error (red) is a vehicle that cannot do what it is built for: a liftoff thrust-to-weight below 1, a first stage with nothing but vacuum engines, a stage that mixes propellants, or a top stage with legs whose landing engine cannot fire at sea level.
- A warning (amber) is a vehicle that will probably fail: a liftoff thrust-to-weight under 1.15 or over 2.2, vacuum engines on the first stage, more engines than fit the base, an upper stage that ignites at under 0.45 of its weight, a total Δv under 9.3 km/s, a top stage without a heat shield or without legs, or a top-stage engine with fewer than the three ignitions that ascent, de-orbit and landing need.
- A note (grey) is something to know: that the top stage cannot hover and has to hoverslam, that an engine does not gimbal, that the top stage has no grid fins, or that a booster has legs but no fins to steer home with.
None of them stops a launch. The checks follow the mission: those about orbit and re-entry disappear for a hop, and those about sea level, air and heat shields for the Moon, where there is none. The readiness card sums them up in one line — Design checks passed, or 2 design warnings — which opens this panel when clicked.
Name and payload
Name is what the vehicle is called in the timeline, the console and the report, up to 32 characters. Payload mass is what the top stage carries, from nothing to 60 t. With a payload the vehicle gets a fairing; with none, the hint says none — just a nose cap.
Stages
Stages are listed from the bottom up, with a count against the limit — 2 of 4. Folded, a card shows its engines, its propellant and its Δv on one line. Opened, it holds every setting of the stage, and at the foot what they add up to.
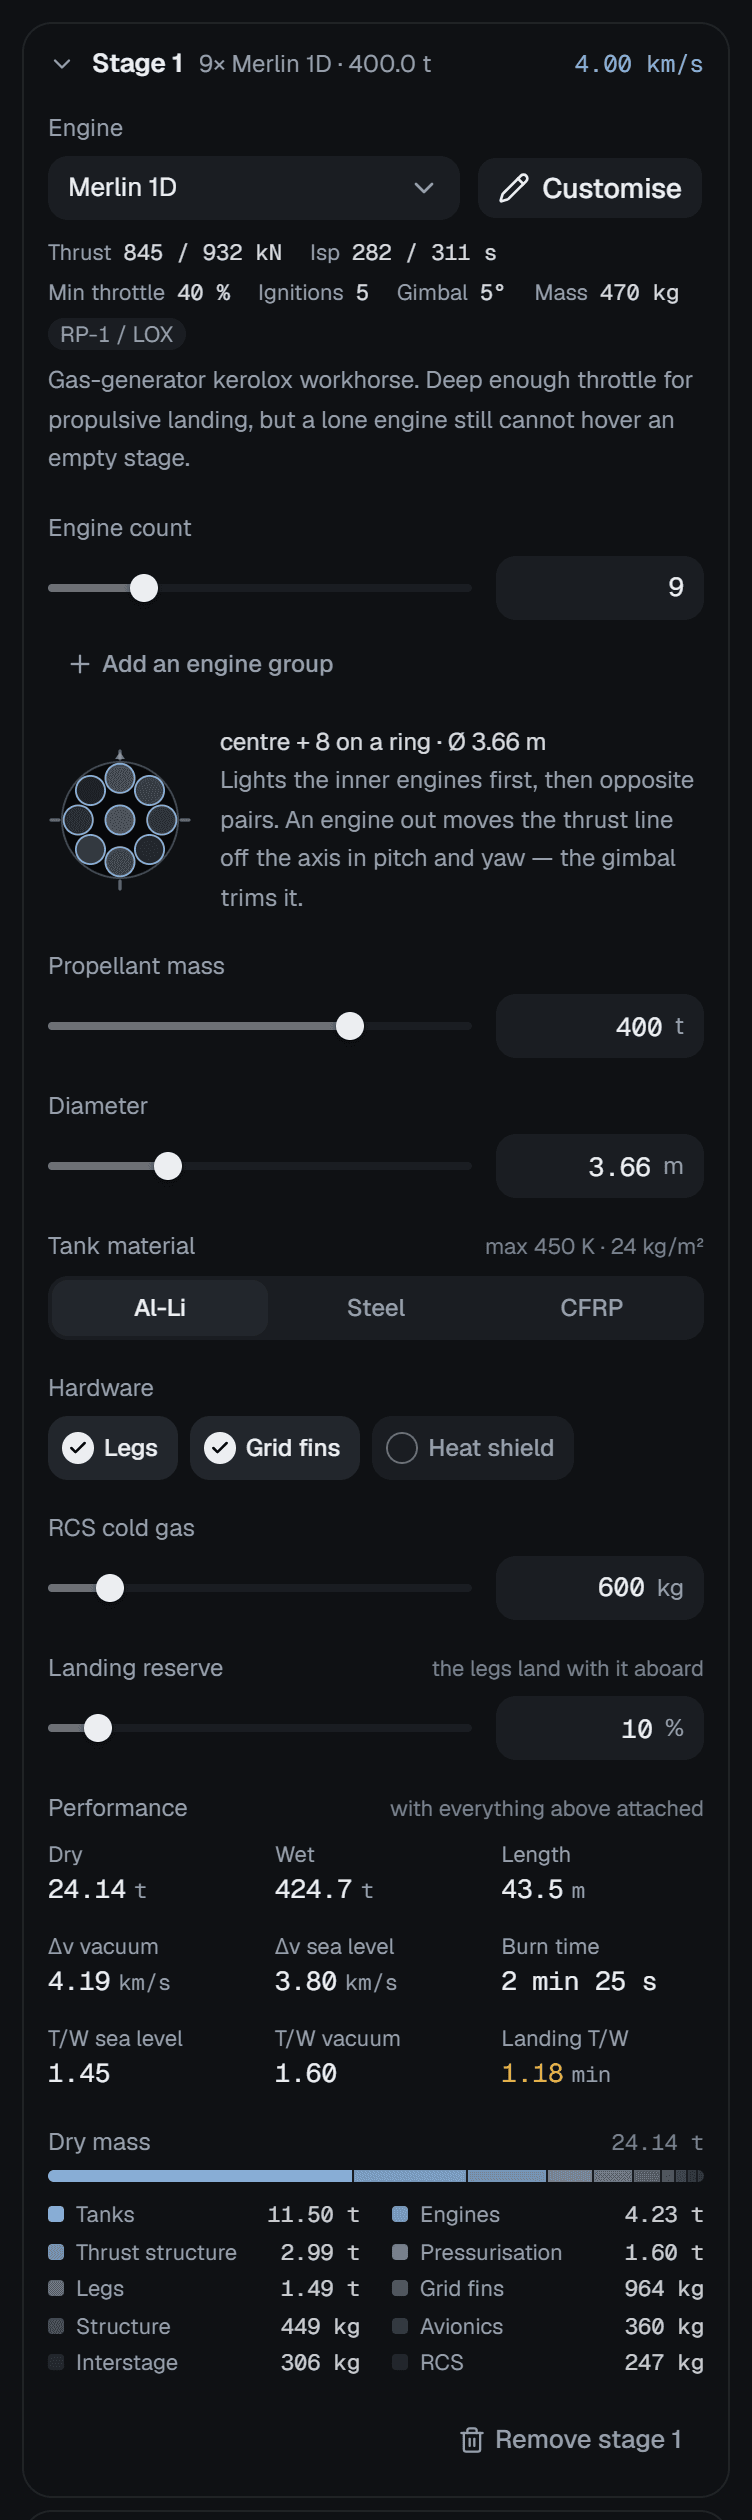
- 1The stage in one line: engines, propellant, Δv.
- 2The engine, from the catalogue.
- 3Customise: an editable copy of that engine.
- 4Its specification, propellant and a note.
- 5How many.
- 6Add an engine group: a second engine type.
- 7The layout on the base, seen from below.
- 8Propellant mass and diameter.
- 9Tank material.
- 10Legs, grid fins, heat shield.
- 11RCS gas, and the landing reserve the legs are built for.
- 12Performance with everything above attached.
- 13Dry mass, part by part.
From the top:
- Engine picks from the catalogue, grouped into Sea level and boosters and Vacuum-optimised. Under it a line gives the engine's thrust at sea level and in vacuum, its specific impulse, minimum throttle, ignitions, gimbal range and mass, tags it Vacuum if it is one, names its propellant, and adds a sentence about the engine.
- Engine count, up to forty on a stage.
- The layout is the base of the stage seen from below, with each engine drawn at its exit diameter where the designer places it: a centre engine, rings around it, and the legs at the four quarters. The brighter an engine, the earlier it lights. The text beside it says how the engines light and what an engine failure does.
- Propellant mass and diameter. The propellant slider is logarithmic, from half a tonne to 5,000 t, because a hopper and a super-heavy booster both have to fit on it.
- Tank material: Al-Li, Steel or CFRP, with the material's temperature limit and areal density beside the label.
- Hardware: landing legs, grid fins and a heat shield, each a toggle.
- RCS gas for the attitude thrusters. On a steel methalox stage flying a real site the field is labelled for the hot-gas thrusters it uses instead.
- Landing reserve appears when the stage has legs: the share of its propellant the legs are built to land with. A bigger reserve makes stronger, heavier legs.
- Performance, with everything above the stage attached: dry and wet mass, length, Δv in vacuum and at sea level, burn time, thrust-to-weight at sea level and in vacuum, and the landing T/W — one engine at its lowest throttle against the empty stage. Amber above 1 means the stage cannot hover.
- Dry mass, as a bar and a list of parts, heaviest first.
- Remove stage at the foot, when there is more than one.
Every number field has a slider and a box. The box is the keyboard's way in: type a value, or use ↑ and ↓ to step it, with Shift for ten steps at a time. A value outside the field's range is outlined in red and is not applied until you leave the box, when it is brought back into range.
Add an upper stage, under the last card, puts a new stage on top: one Merlin Vacuum, a quarter of the current top stage's propellant, the same diameter and material, and no recovery hardware. The designer allows four stages, as many as the Odyssey stack flies. The vehicle explains what each setting costs and buys.
Customising an engine
Customise swaps the catalogue engine for an editable copy of it, named Custom Merlin 1D or whatever it was based on, and opens eight fields under it: vacuum thrust, mass, specific impulse at sea level and in vacuum, minimum throttle, gimbal range, ignitions and propellant. The sea-level thrust and the mass flow are not fields; the designer works them out from the rest.
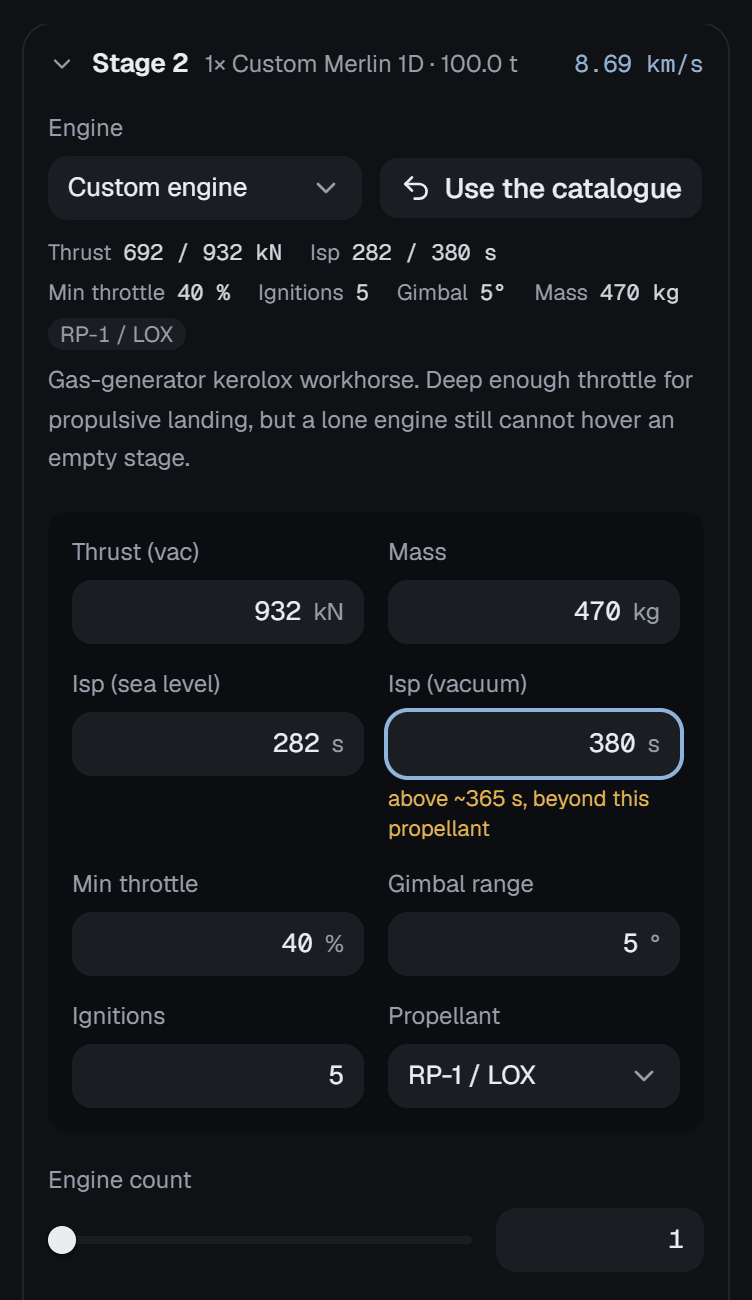
The fields say when a number stops being plausible. A vacuum Isp above what the propellant can deliver — about 365 s for kerolox, 385 s for methalox, 470 s for hydrolox — is flagged in amber; a sea-level Isp within 20 s of that limit is unrealistically high; and a vacuum Isp below the sea-level one is flagged in red, and the sea-level figure is used for both. The designer still builds whatever you type: the flags are there so the vehicle stays one that could exist. Use the catalogue puts the original engine back.
Engine groups
Add an engine group puts a second engine type on the stage — the vacuum version of its propellant's engine if it has none yet, one to start with. A stage takes up to four groups and forty engines in all. Each group gets its own engine, count and customisation, and the first one is marked lights first.
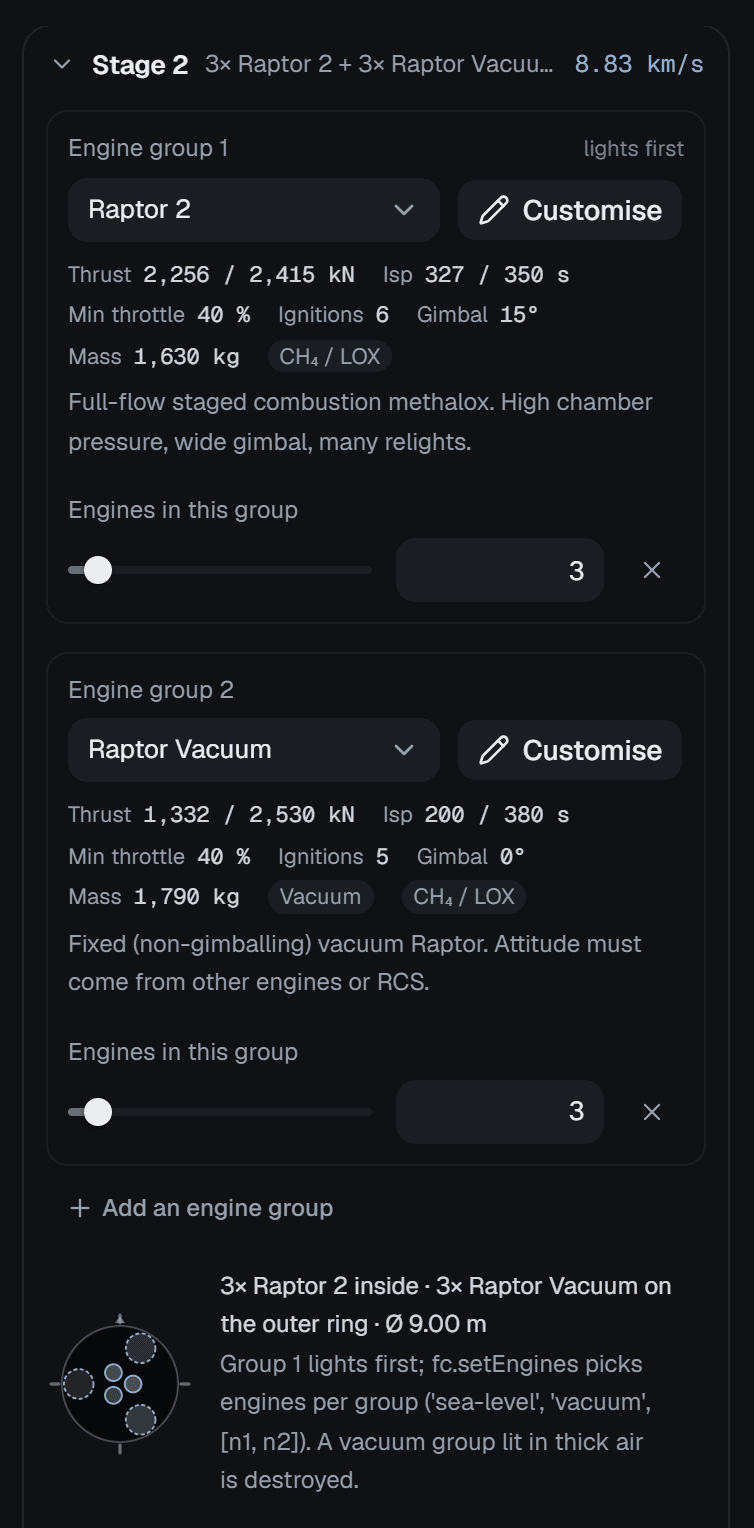
Which groups burn is the program's decision, through fc.setEngines(), and a
vacuum group lit in thick air is destroyed. If stage 1 mixes vacuum and
sea-level engines and the program never calls fc.setEngines, the readiness
card warns that the vacuum engines would light on the pad.
What changes when
Edits reach the design immediately. The overview, the checks and the stage cards update as you type, the rocket on the pad is rebuilt a fifth of a second after you stop, and the readiness card a third of a second after that.
A flight in the air is not affected: it flies the vehicle it was launched with. Changing the design mid-flight puts an amber dot on the rail's Vehicle tab and a strip across the top of the panel.
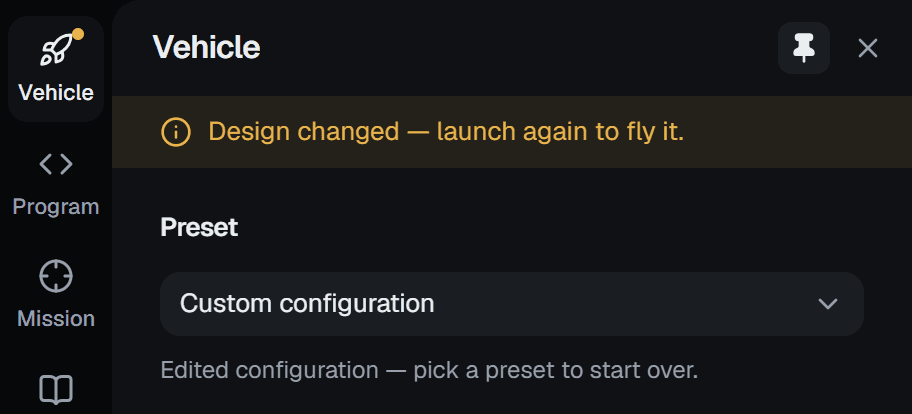
Launch again flies the new design. The Program and Mission panels behave the same way, with Program edited — launch again to fly it and Mission changed — launch again to apply.